How do I configure my neovim lazily
Motivation
As a loyal vscode user, I have been through the process of despising vimer \(\rightarrow\) understanding vimer \(\rightarrow\) becoming vimer. In the past 4 or 5 years, I tried several times to use vim, but it always ended up with me going back to vscode, as vim seems to be too hard to learn and too complicated to configure and customize. Recently, I noticed the neovim project and several open-source projects that help people configure their neovim easily and lazily. I then decided to give it a try and see if I can finally become a vimer. And... I did it! And now I am trying to switch everything to neovim.
Vi, Vim, Neovim, and AstroNvim
It all started with the vi editor, which was created in 1976 by Bill
Joy who was a student at UC Berkeley at that time. He used a
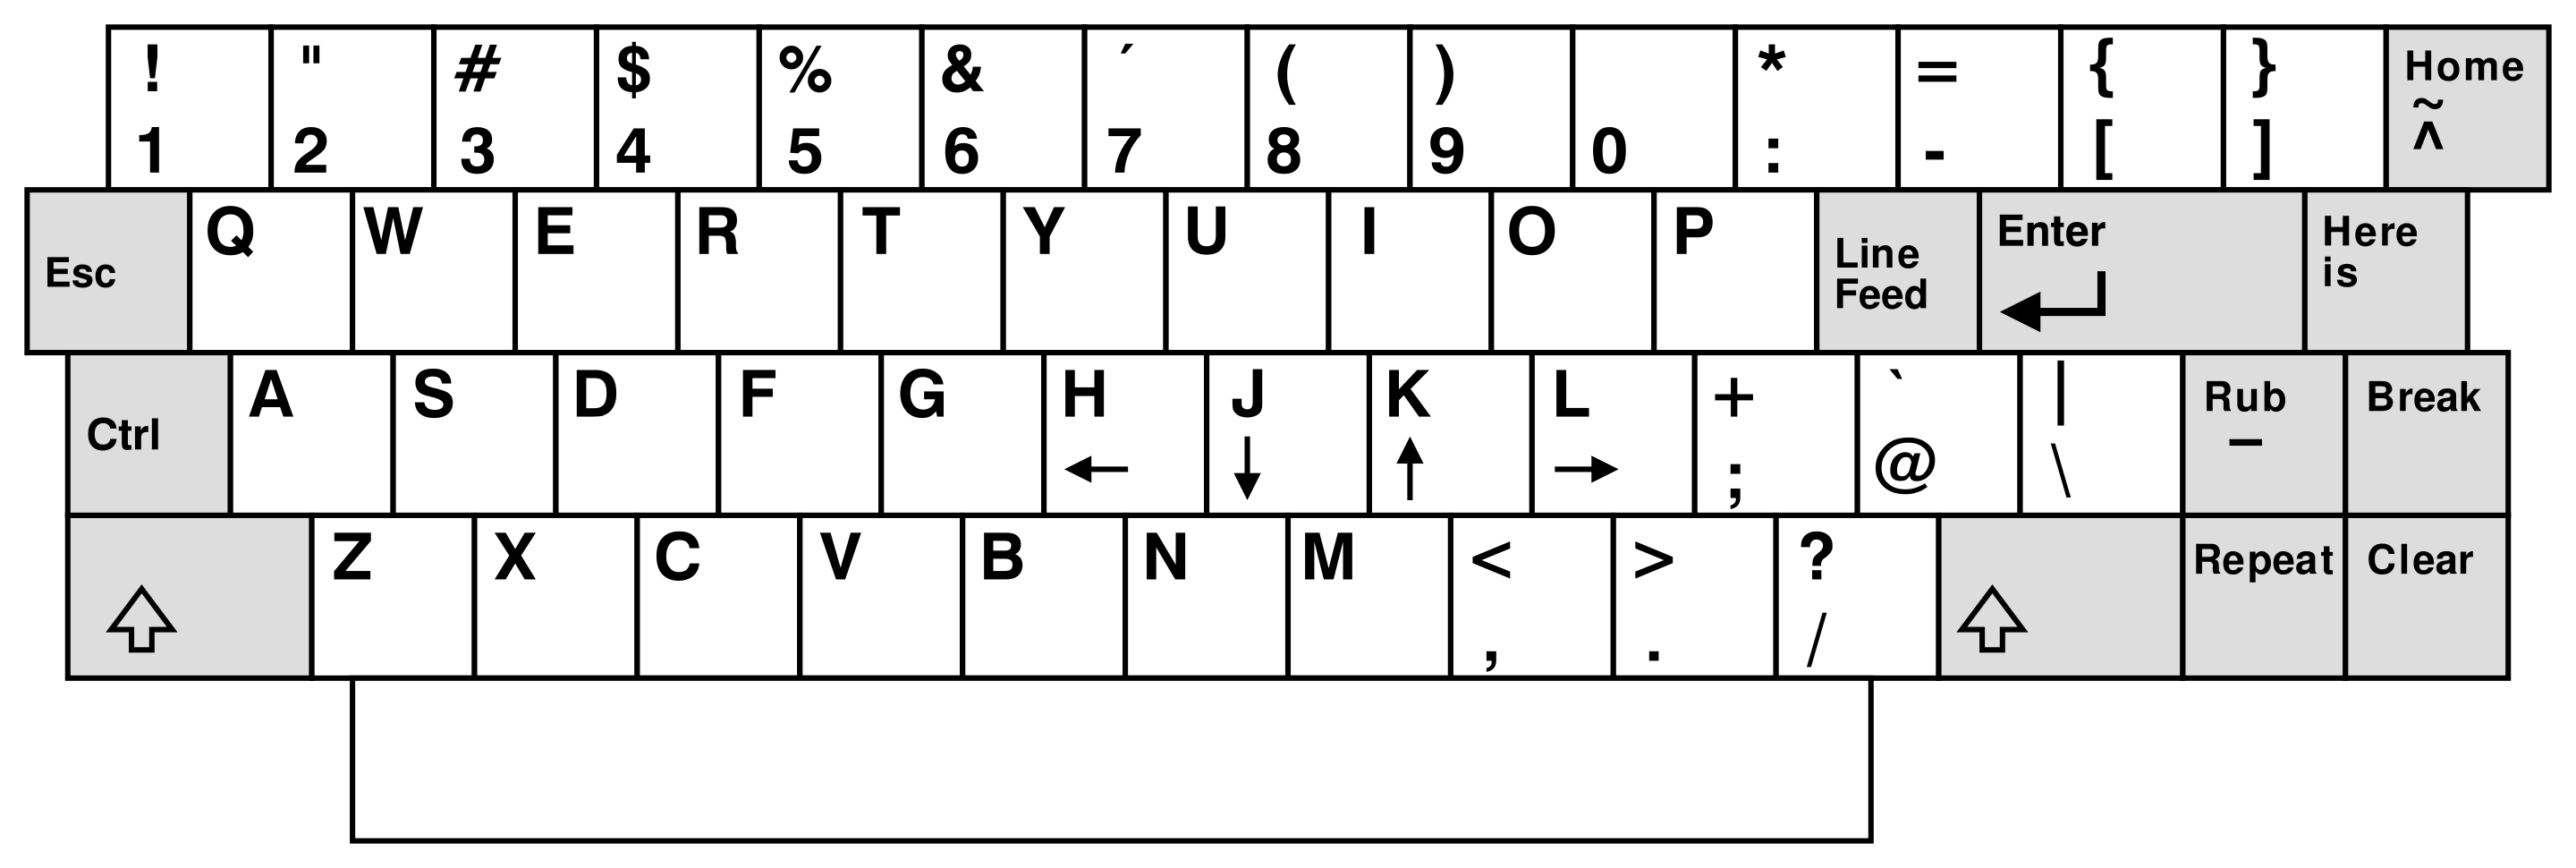
Lear-Siegler ADM-3A terminal to write the vi editor, and due to that the
terminal keyboard has a very small and strange layout, the vi editor
thus inherited this evil. For example, keys h,
j, k and l serve as the cursor
movement keys, which really made me confused at the beginning. I refer
you to the Wikipedia page
for more stories behind this.

Vim, or "vi improved", is Bram Moolenaar's improved version of vi. It brings a lot of new features and improvements, such as completion, syntax highlighting, mouse interaction, extended regular expressions, etc. And it is still being actively developed and maintained, and is used by many people around the world.
When people are trying to improve one thing, they often find that starting a new project is easier. Neovim is such an improved version of vim which is the improved version of vi. Comparing with vim, neovim is more modern with strong extensibility. It employs Lua as its configuration language, and has a built-in language server protocol (LSP) client. It is said that neovim is more friendly to plugin developers. And for us, it is easier to make it vscode-like, or whatever we want it to be.
Like three or four years ago, when I first knew about neovim, I despise the guys who were trying to make it as fancy as vscode, as I thought that it was a waste of time. But now, I am one of them. This is because many open-source projects have been created to make this process easier. Among them I have tried:
As well as AstroNvim which I am using now. (A more comprehensive list can be found at awesome-neovim). Comparing with other projects, to me, AstorNvim has the following advantages: (1) faster, (2) easier to configure. Those two reasons are important to me because I often use clusters which have very old and outdated environments, and the resources are limited (eg., on Hoffman2, the memory of login node is limited to 1 GB). In addition, the UI of AstroNvim is more aesthetic to me, and the layout is more reasonable, so I chose it to be the base of my neovim configuration.
Basics of configurations
vim configuration
Before neovim, we should know something about the
~/.vimrc file that configures vim. .vimrc file
basically contains a list of command that you would type in the command
mode of vim. For example, if you want to see line numbers every time you
open a file, you can add the following line to your .vimrc
file:
1 | set number |
When launching vim, it will read the .vimrc file and
execute all the commands in it. But neovim is different, it uses lua
language to configure itself, meaning that you have to write lua code to
configure it. When I first learned about this, I felt strange, like, why
do I have to learn another language to configure a text editor? But be
easy, lua is very simple, and you only need to know a few basic syntax
to understand the existing configurations and copy and paste to create
your own.
Neovim lua configuration
Different from the logic of .vimrc which runs every line
of the commands, the lua configuration file is composed of functions,
dictionaries, and tables, that are more organized. For example, the same
command set number in .vimrc, should be
written as follows instead, in ~/.config/nvim/init.lua:
1 | vim.opt.number = true |
The vim.opt is a dictionary that contains all the vim
options. For more sophisticated configurations of .vimrc,
one should check the documentation carefully, and translate them to lua
code like above.
Plugins
Neovim is known for its strong extensibility, and it is easy to
install and manage plugins. There are two popular plugin managers for
neovim, Packer
and Lazy. They are more
or less the same, and here we just show how Lazy works. Add the
following code to your ~/.config/nvim/init.lua:
1 | local lazypath = vim.fn.stdpath("data") .. "/lazy/lazy.nvim" |
As the lua language is easy to read, you may understand that the code
above basically install the lazy plugin manager if it is not installed,
and then load it. The plugins and opts are the
configurations of the plugins, and they can be placed in the
init.lua file or in a separate file, like
~/.config/nvim/lua/plugins.lua.
With Lazy configured, plugins can be installed and configured by
adding information to the plugins and opts
dictionaries. For example, to install the neo-tree
plugin, you can add the following code to either
lua/plugins.lua or
lua/plugins/neo-tree.lua:
1 | return { |
And add the plugins dictionary in
init.lua:
1 | local plugins = require("plugins") |
before the line require("lazy").setup(plugins, opts).
This line just load everything from lua/plugins.lua and
everything else from the folder lua/plugins.
AstroNvim configuration
Bearing the above knowledge in mind, it is super easy to understand
the AstroNvim configuration. Follow the official website, it is simply a
matter of git clone:
1 | # Backup the old configuration |
Looking into the ~/.config/nvim folder, the structure is
something like:
1 | ❯ tree ~/.config/nvim -L 2 |
Here, init.lua calls everything in
lua/astronvim and lua/plugins, and they are
part of the git repo. The lua/user/ folder, however, is
included in the .gitignore file, meaning that it is for
your own customization.
AstroNvim also provides a convenient way to configure other plugins,
as you don't have time to set everything up by yourself. That is,
AstroNvim has a community-driven plugin configuration repo, that is AstroCommunity.
And simply by adding import lines, most popular plugins can
be easily configured perfectly, and that was initially why I turned to
AstroNvim rather than other projects. Take copilot as an example, the
configuration concerns with the copilot.lua, as well as the
the settings for cmp, and it drove me crazy, as sometimes I
wanted to have copilot completion word by word, rather than a whole
block. But with this community configuration, all I need to do is to add
the following line to lua/user/plugins/community.lua:
1 | return { |
which loads AstroNvim/astrocommunity and then the
astrocommunity.completion.copilot-lua-cmp configuration. By
reading the configuration file in the git repo, I get to know that
<C-l> is the key to trigger the one-word completion,
and <C-j> is to trigger the one-line completion.
Snippets
VSCode snippet system is the feature that I cannot
live without. It is so powerful and easy to configure. But here, neovim
can also replicate it with the help of the LuaSnip plugin,
just put the following content in
lua/user/plugins/luasnip.lua:
1 | return { |
which allows the LuaSnip plugin to load the snippets
from the lua/user/snippets folder, in which a
package.json file should be created to contain the
information of your snippets, for example:
1 | { |
Lastly, the markdown.json file should contain the
snippets, for example:
1 | { |
Pointing the contents >bm and
>aligned to the corresponding snippets. Please note that
no comments are allowed in these json files, different from
VSCode.
Dashboard
Although I admit that I truly think it is worthing doing, but man,
you can't resist the temptation to customize all decorations in your
neovim. I recommend to generate ASCII art with the help of patorjk.com, or take
whatever you like from the ASCII art
archive, and add them to
lua/user/plugins/dashboard.lua. I generated the
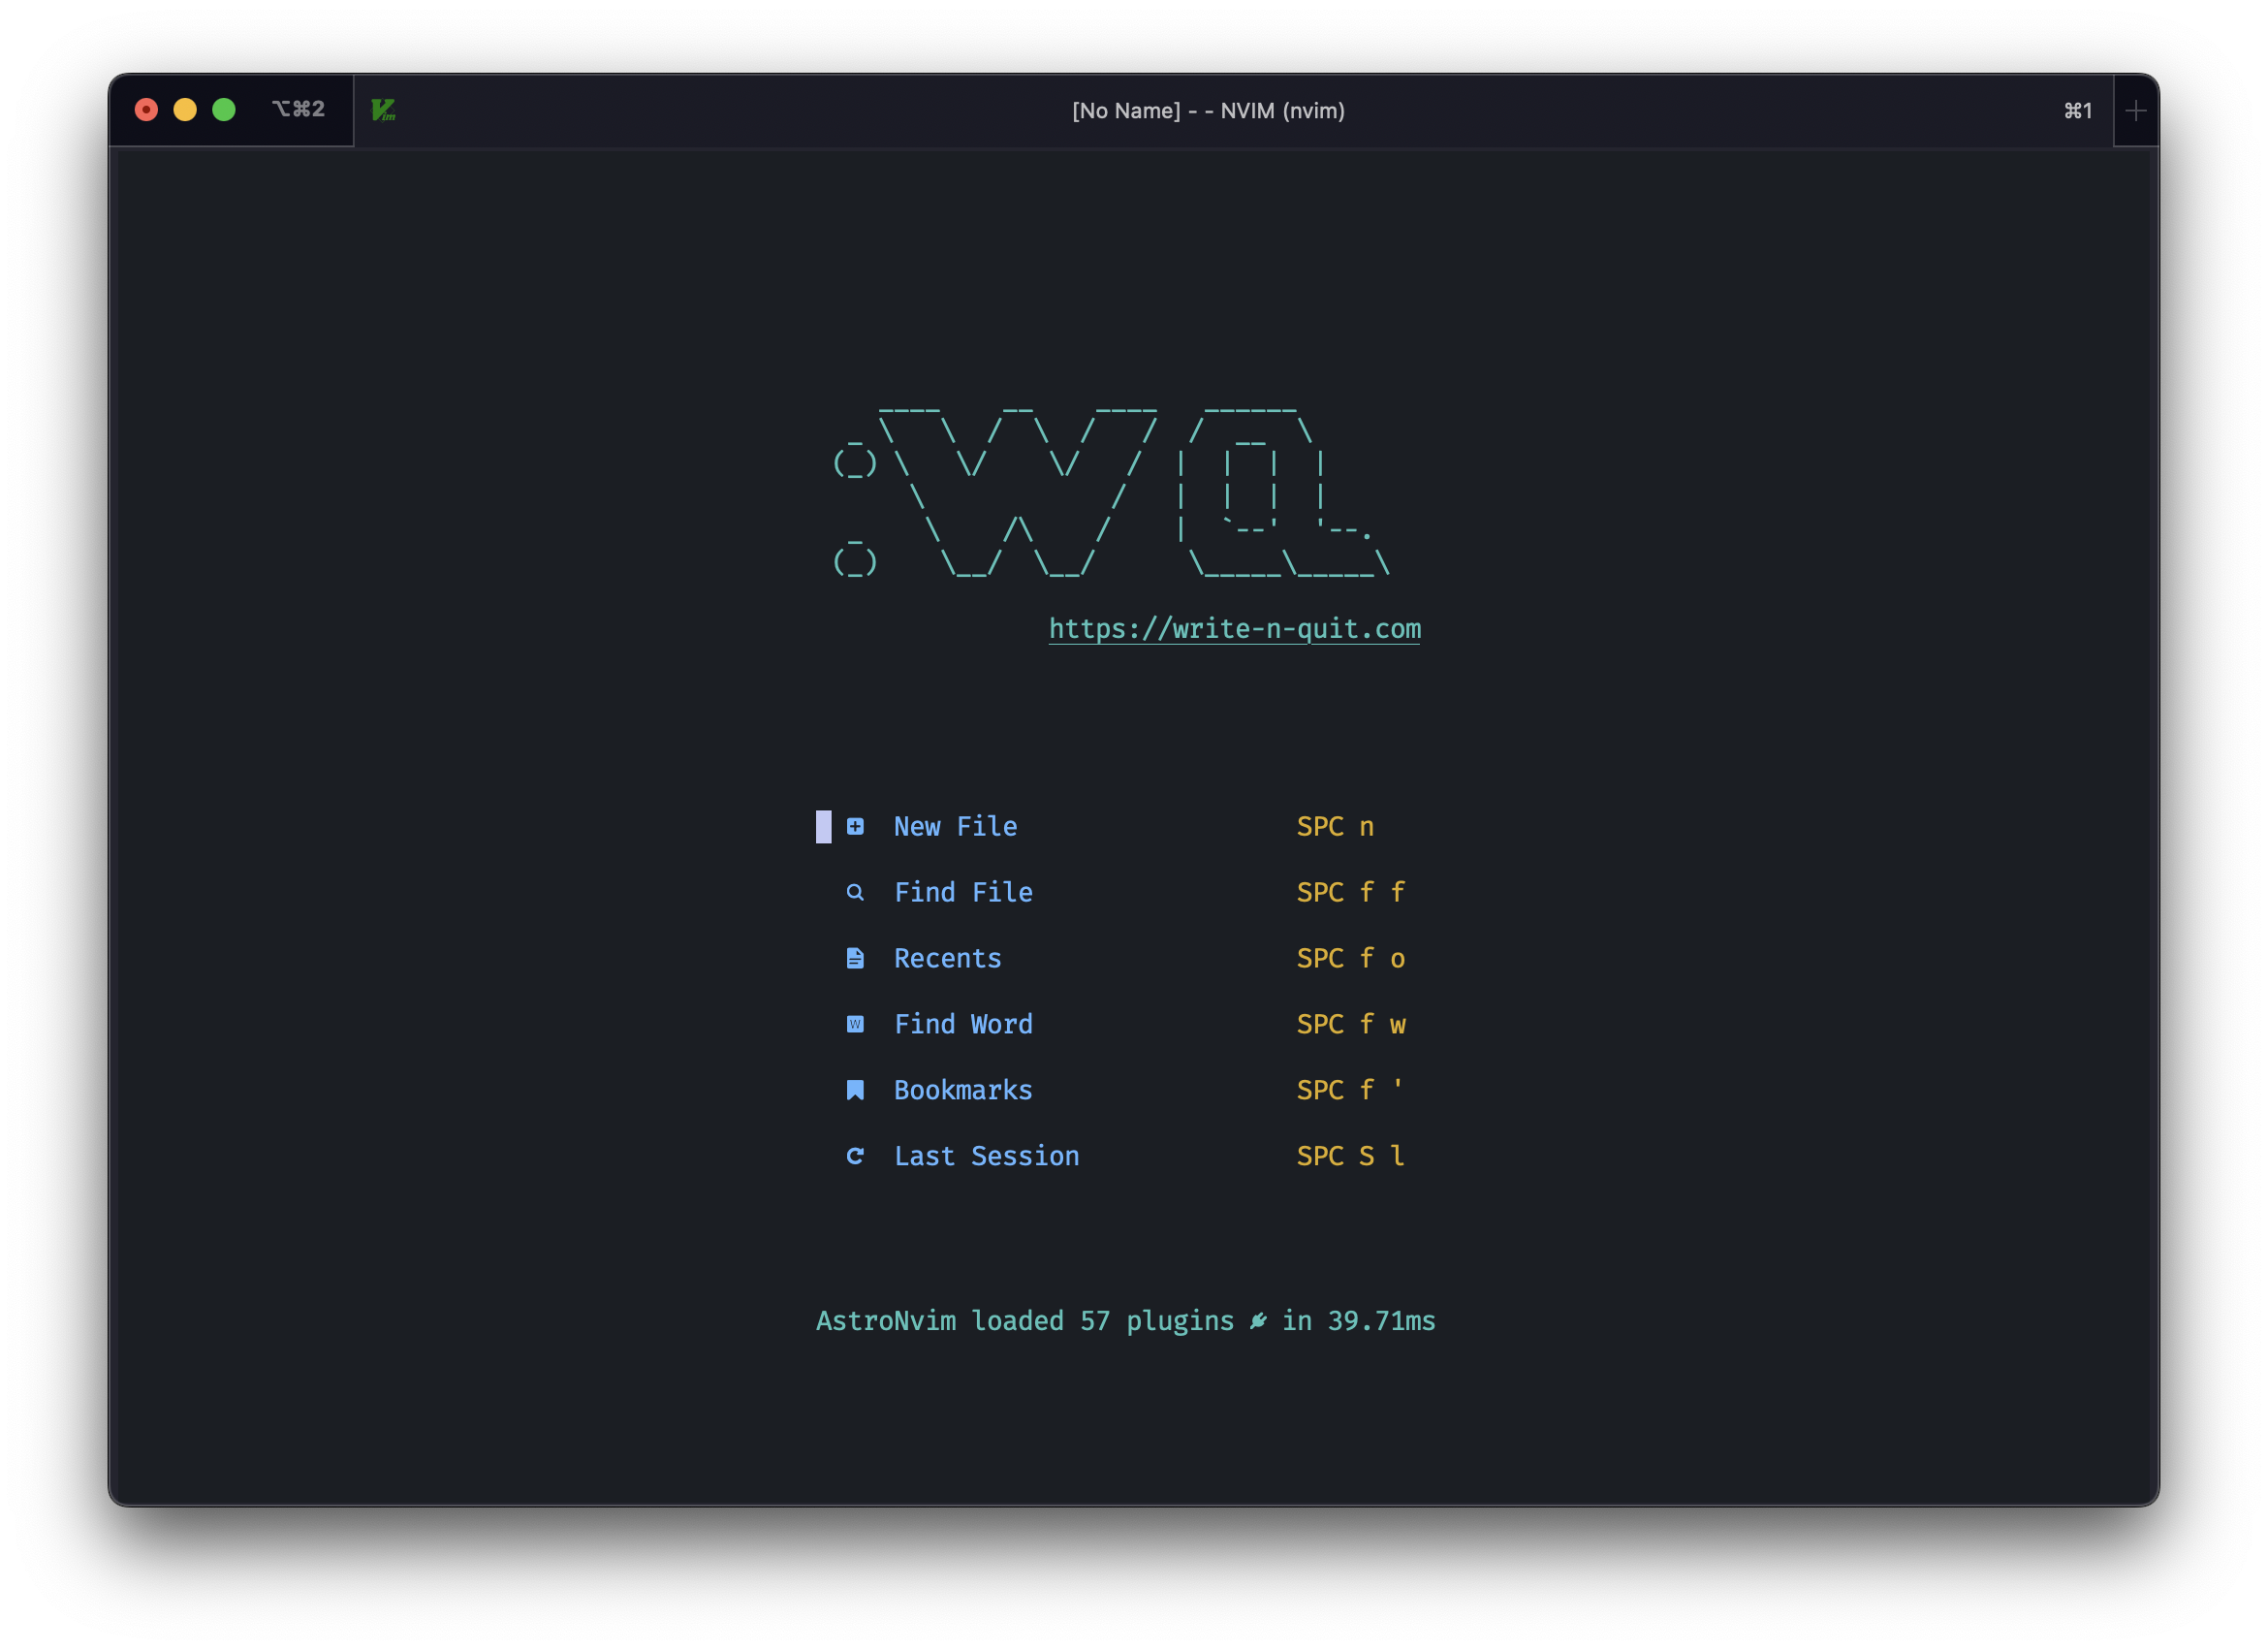
:wq ASCII art as follows:
1 | return { |
Note that here the backslashes are doubled. The result is something like:
